|
|||||||||||

Using Carbon Copy Cloner (CCC) Version 4 for Automatic, Scheduled Backups to a File Server
Services
- ETH Doodle for scheduling events and making choices.
- CISD File Exchanger enables the exchange of large files.
- Print Service
Documents
- Legal Aspects (BOT, Cloud Services, etc.)
Infos
There are no articles available.
![]()
Operating System: MacOS X 10.10 or higher
CCC Version:      4.1.6
Initial Version:  09.10.2012 by Marc Petitmermet (mp)
                  18.10.2012 moving text, mp
                  03.04.2014 marked optional steps, mp
                  29.04.2016 updated screenshots for version 4 of CCC
Please Note
- Documentation for version 3 of CCC
- This documentation is only valid for D-MATL ETH Zurich. Your setup might be different.
- This documentation concentrates only on backing up important ETH research data and not creating complete, bootable disks with operating systems, installed programs and private data. For this task you can use CCC as well but use some different storage, i.e. an external disk.
- In any case make sure that you do exclude caches and virtual images of your virtual operating systems running under Paralles or VMWare Fusion. Virtual images are huge files and are changed every time they are run and CCC makes a copy of the complete files all the time.
Installation
- get an official license for CCC (free of cost)
- get the latest version of CCC
- install CCC by double clicking on the zip file and copying CCC to the Applications folder
Configuration
- create a folder on the file server where CCC should store the backups in:
Finder > Go > Connect to Server: smb://domain\username@server/path_to_your_home_directory [1,2]
Finder > File > New Folder: e.g. backup_ccc - disconnect from the file server
- reconnect to the file server but now include the backup folder, e.g. backup_ccc in this example, in the mount path:
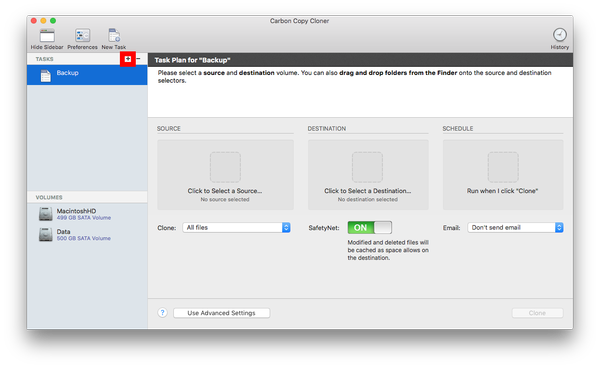
smb://domain\username@server/path_to_your_home_directory/backup_ccc - Start CCC (Figure 1) and on click the "+"-sign in the sidebar to create a new task. In this example the tasks is named "Backup".
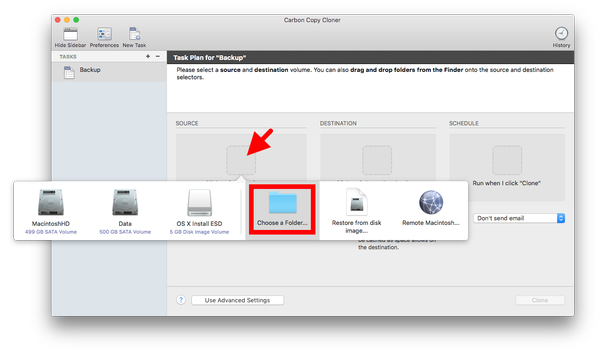
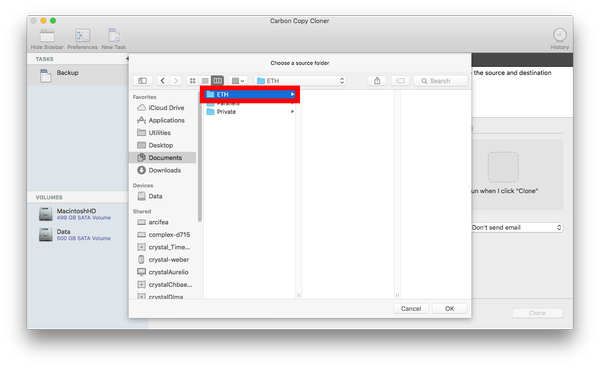
- Click on the SOURCE in the main window (Figure 2a) and choose the data to be backed up; in this example we only choose the folder "ETH" in the Documents folder (Figure 2b).
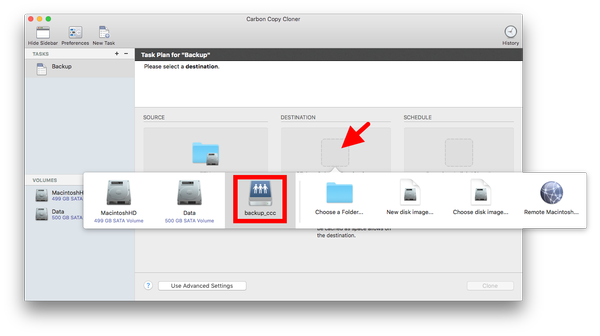
- Click on DESTINATION on the main window and select the network share that was connected to in step 3, "backup_ccc" in this example (Figure 3).
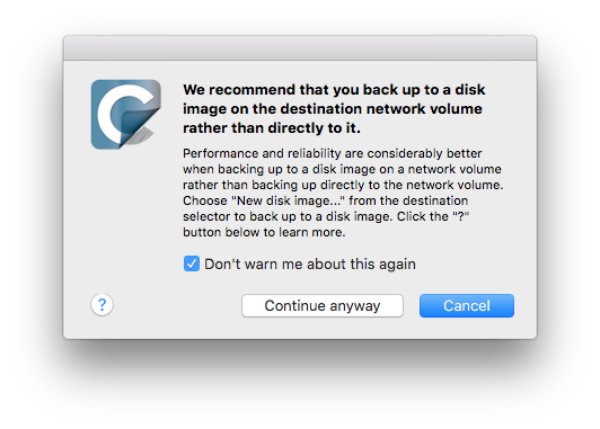
- CCC now recommends to backup to a disk image on the network volume rather than backing up directly to the network volume. Click on continue anyway (Figure 4). The main reason is that you might want to access the data with none-MacOSX operating systems that cannot open these type of disk images.
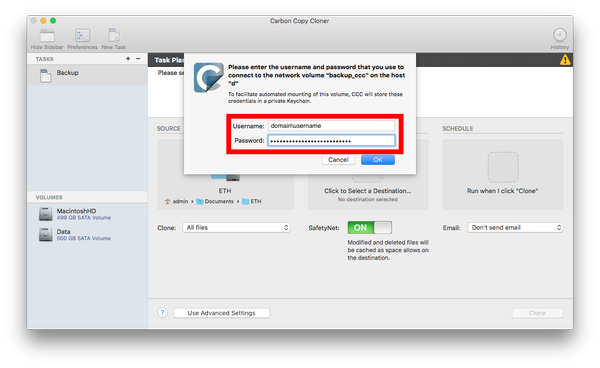
- CCC asks for the username and password for accessing the network volume (Figure 5).
- Click on SCHEDULE to define a schedule for the backup process (Figure 6). In this example a backup every 2 hours is defined.
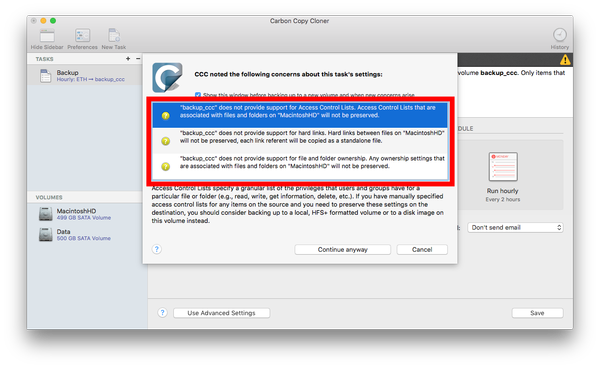
- CCC shows various warning messages about not being able to support Access Control Lists, hard links and file and folder ownership. But in case of this backup tasks these messages can be ignored. Click on continue anyway.
- Click on clone to start the backup and verify that everything is backed up.

Notes
- Please contact your administrator if you don't know where your home directory is located.
- Depending on your situation you might need to prefix the username with a domain part, i.e. "domain\username".
- The scheduled task described in this document even runs when CCC is not running. A small helper application is running in the background to take care of this. You can even configure to wake the computer from sleep or boot it for the backup task and have it sleep or power down afterwards. This is also the reason why an administrator account is needed to configure scheduled tasks.
Wichtiger Hinweis:
Diese Website wird in älteren Versionen von Netscape ohne
graphische Elemente dargestellt. Die Funktionalität der
Website ist aber trotzdem gewährleistet. Wenn Sie diese
Website regelmässig benutzen, empfehlen wir Ihnen, auf
Ihrem Computer einen aktuellen Browser zu installieren. Weitere
Informationen finden Sie auf
folgender
Seite.
Important Note:
The content in this site is accessible to any browser or
Internet device, however, some graphics will display correctly
only in the newer versions of Netscape. To get the most out of
our site we suggest you upgrade to a newer browser.
More
information
