|
|||||||||||

Windows 10 Backup using built-in File History
Services
- ETH Doodle for scheduling events and making choices.
- CISD File Exchanger enables the exchange of large files.
- Print Service
Documents
- Legal Aspects (BOT, Cloud Services, etc.)
Infos
There are no articles available.
![]()
Operating Systems: Windows 10
published:         28.06.2016, Marc Petitmermet
update:            27.06.2017, Marc Petitmermet
                    - step 6: added information about domain name
                    - step 8: added informatation about daily backup
                    - step 9: new Exclude Folders
                    - step 10: new add additional path to File History
                    - step 10: enhance description
                   23.02.2021: remove Windows 8.1, some text enhancements
                    - step 10: added two screenshots
Introduction
Backing up your valuable data, such as your PhD thesis or
drafts of your next paper, is an important task. If you login into a
domain such as "d", "d-matl" or "matl" your home directory might
already be stored on a file server and you don't need to read any
further; in this case your IT administrator takes care of the daily
backup. But in case your home directory and all your data is stored on a
local hard disk (e.g. on a laptop) and you back up your data only once
in a while or even never then you should read on.
To automate backing up your data in such a situation the built-in File History feature of Windows 8 and higher can be used. Please follow the procedure below for setting this up. File History provides backups for Libraries (Documents, Music, Pictures, Videos), Desktop, Contacts and Favourites. Additional folders can be added to File History.
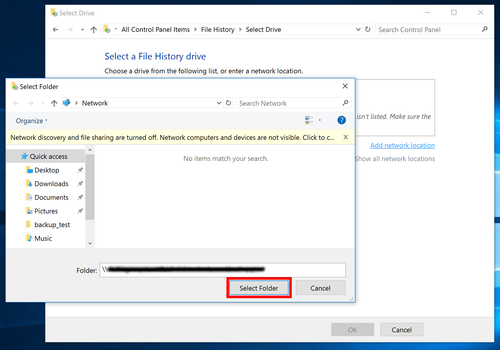
- On the file server prepare a directory where the data should be stored. As en example we use automatic-backup, e.g. \\server\path\to\automatic-backup.
- In Windows search for "control panel", open them and then switch the view to small icons.
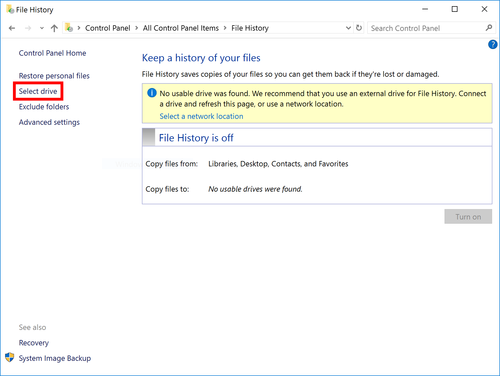
- Open File History and choose Select drive.
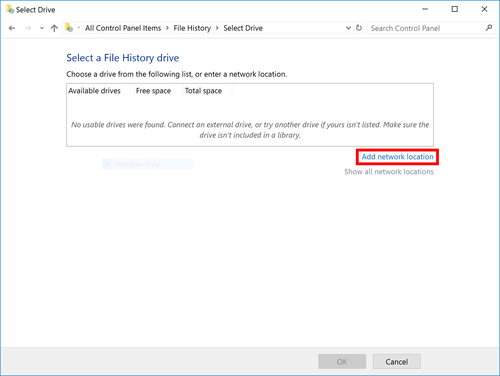
- Choose Add network location if there is none defined yet.
- Manually enter the path to your backup folder on the file server (step 1), e.g. \\server\path\to\automatic-backup and click on Select Folder.
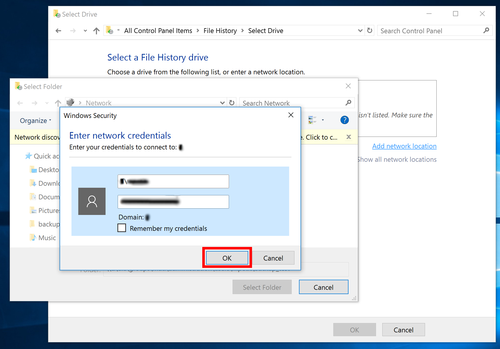
- Enter your login and password to access the file server and click on Remember my credentials. Please note that you might need to add the domain name to your username; e.g. domain\username.
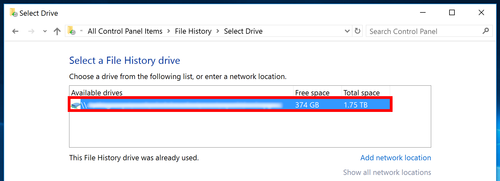
- Select the File History Drive you want to use for the backup (the one you just added).
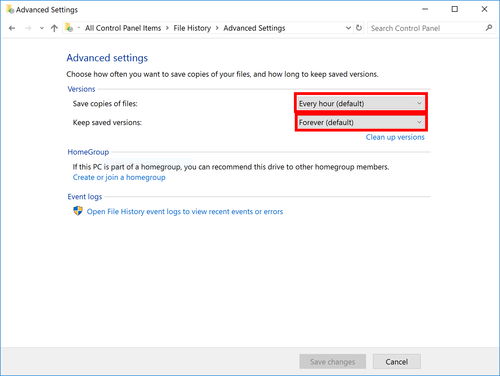
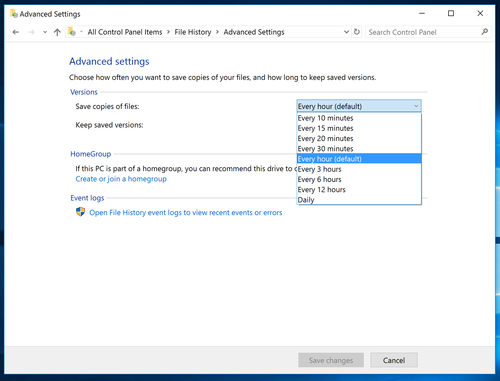
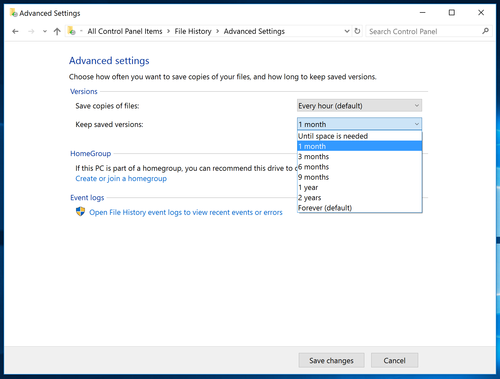
- In the Advanced settings choose how often the backup should run, default is hourly, and set the saved versions to the minimum. Depending on your network share there might already be a backup system that is already providing daily backups.
- If you want to exclude specific folders from being backed up click on Exclude folders.
- If you want to add a folder that is not automatically included in File Histroy, follow the procedure below:
Go to Settings > Update & Security > Backup > Back up using File History: More options: Backup these folders > Add a folder.
The folder can also be a different partition as a whole or a sub folder of a different partition.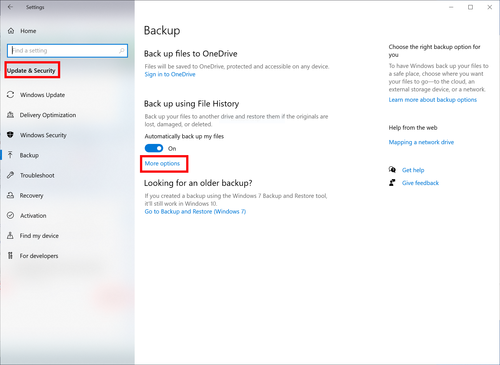

- Make sure that file history is enabled, i.e. click on the Turn on button. Click on Run now to start your first backup.
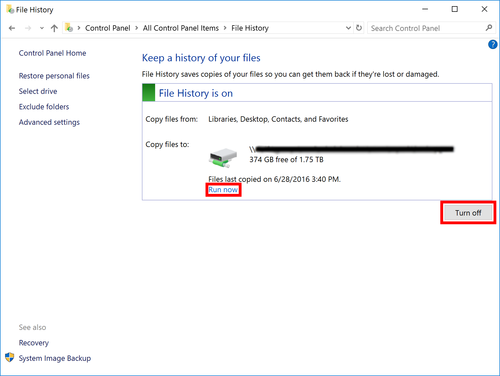
- After the first run, connect to your network directory where you stored that backup, e.g. \\server\path\to\automatic-backup, and verify that the backup is done correctly. Also click on Restore personal files and try to restore a file.


Wichtiger Hinweis:
Diese Website wird in älteren Versionen von Netscape ohne
graphische Elemente dargestellt. Die Funktionalität der
Website ist aber trotzdem gewährleistet. Wenn Sie diese
Website regelmässig benutzen, empfehlen wir Ihnen, auf
Ihrem Computer einen aktuellen Browser zu installieren. Weitere
Informationen finden Sie auf
folgender
Seite.
Important Note:
The content in this site is accessible to any browser or
Internet device, however, some graphics will display correctly
only in the newer versions of Netscape. To get the most out of
our site we suggest you upgrade to a newer browser.
More
information
